
(Read part one first!)
This is the second, and mostly final, post documenting my roll bender build.
The first step in this segment was to bolt the top piece of channel in place, and then add some mounts for the return springs to it and the carriage.
For the mounts I used some scraps of 12mm round bar, and the springs came out of an IKEA sofabed that I found dumped on Forest Hill a few years ago.

the picture is slightly blurry because there was condensation on the lens from my cycle down
Next, the central shaft needed cutting to length, and a flange adding to support the handle. I could have just welded the handle to the shaft, but this way if I need to put the shaft in the lathe at any point in the future, it’ll be no bother.
I used a little collar to support the flange while I tacked it in place, and then welded it out.

flange in position, with a bevel on the shaft
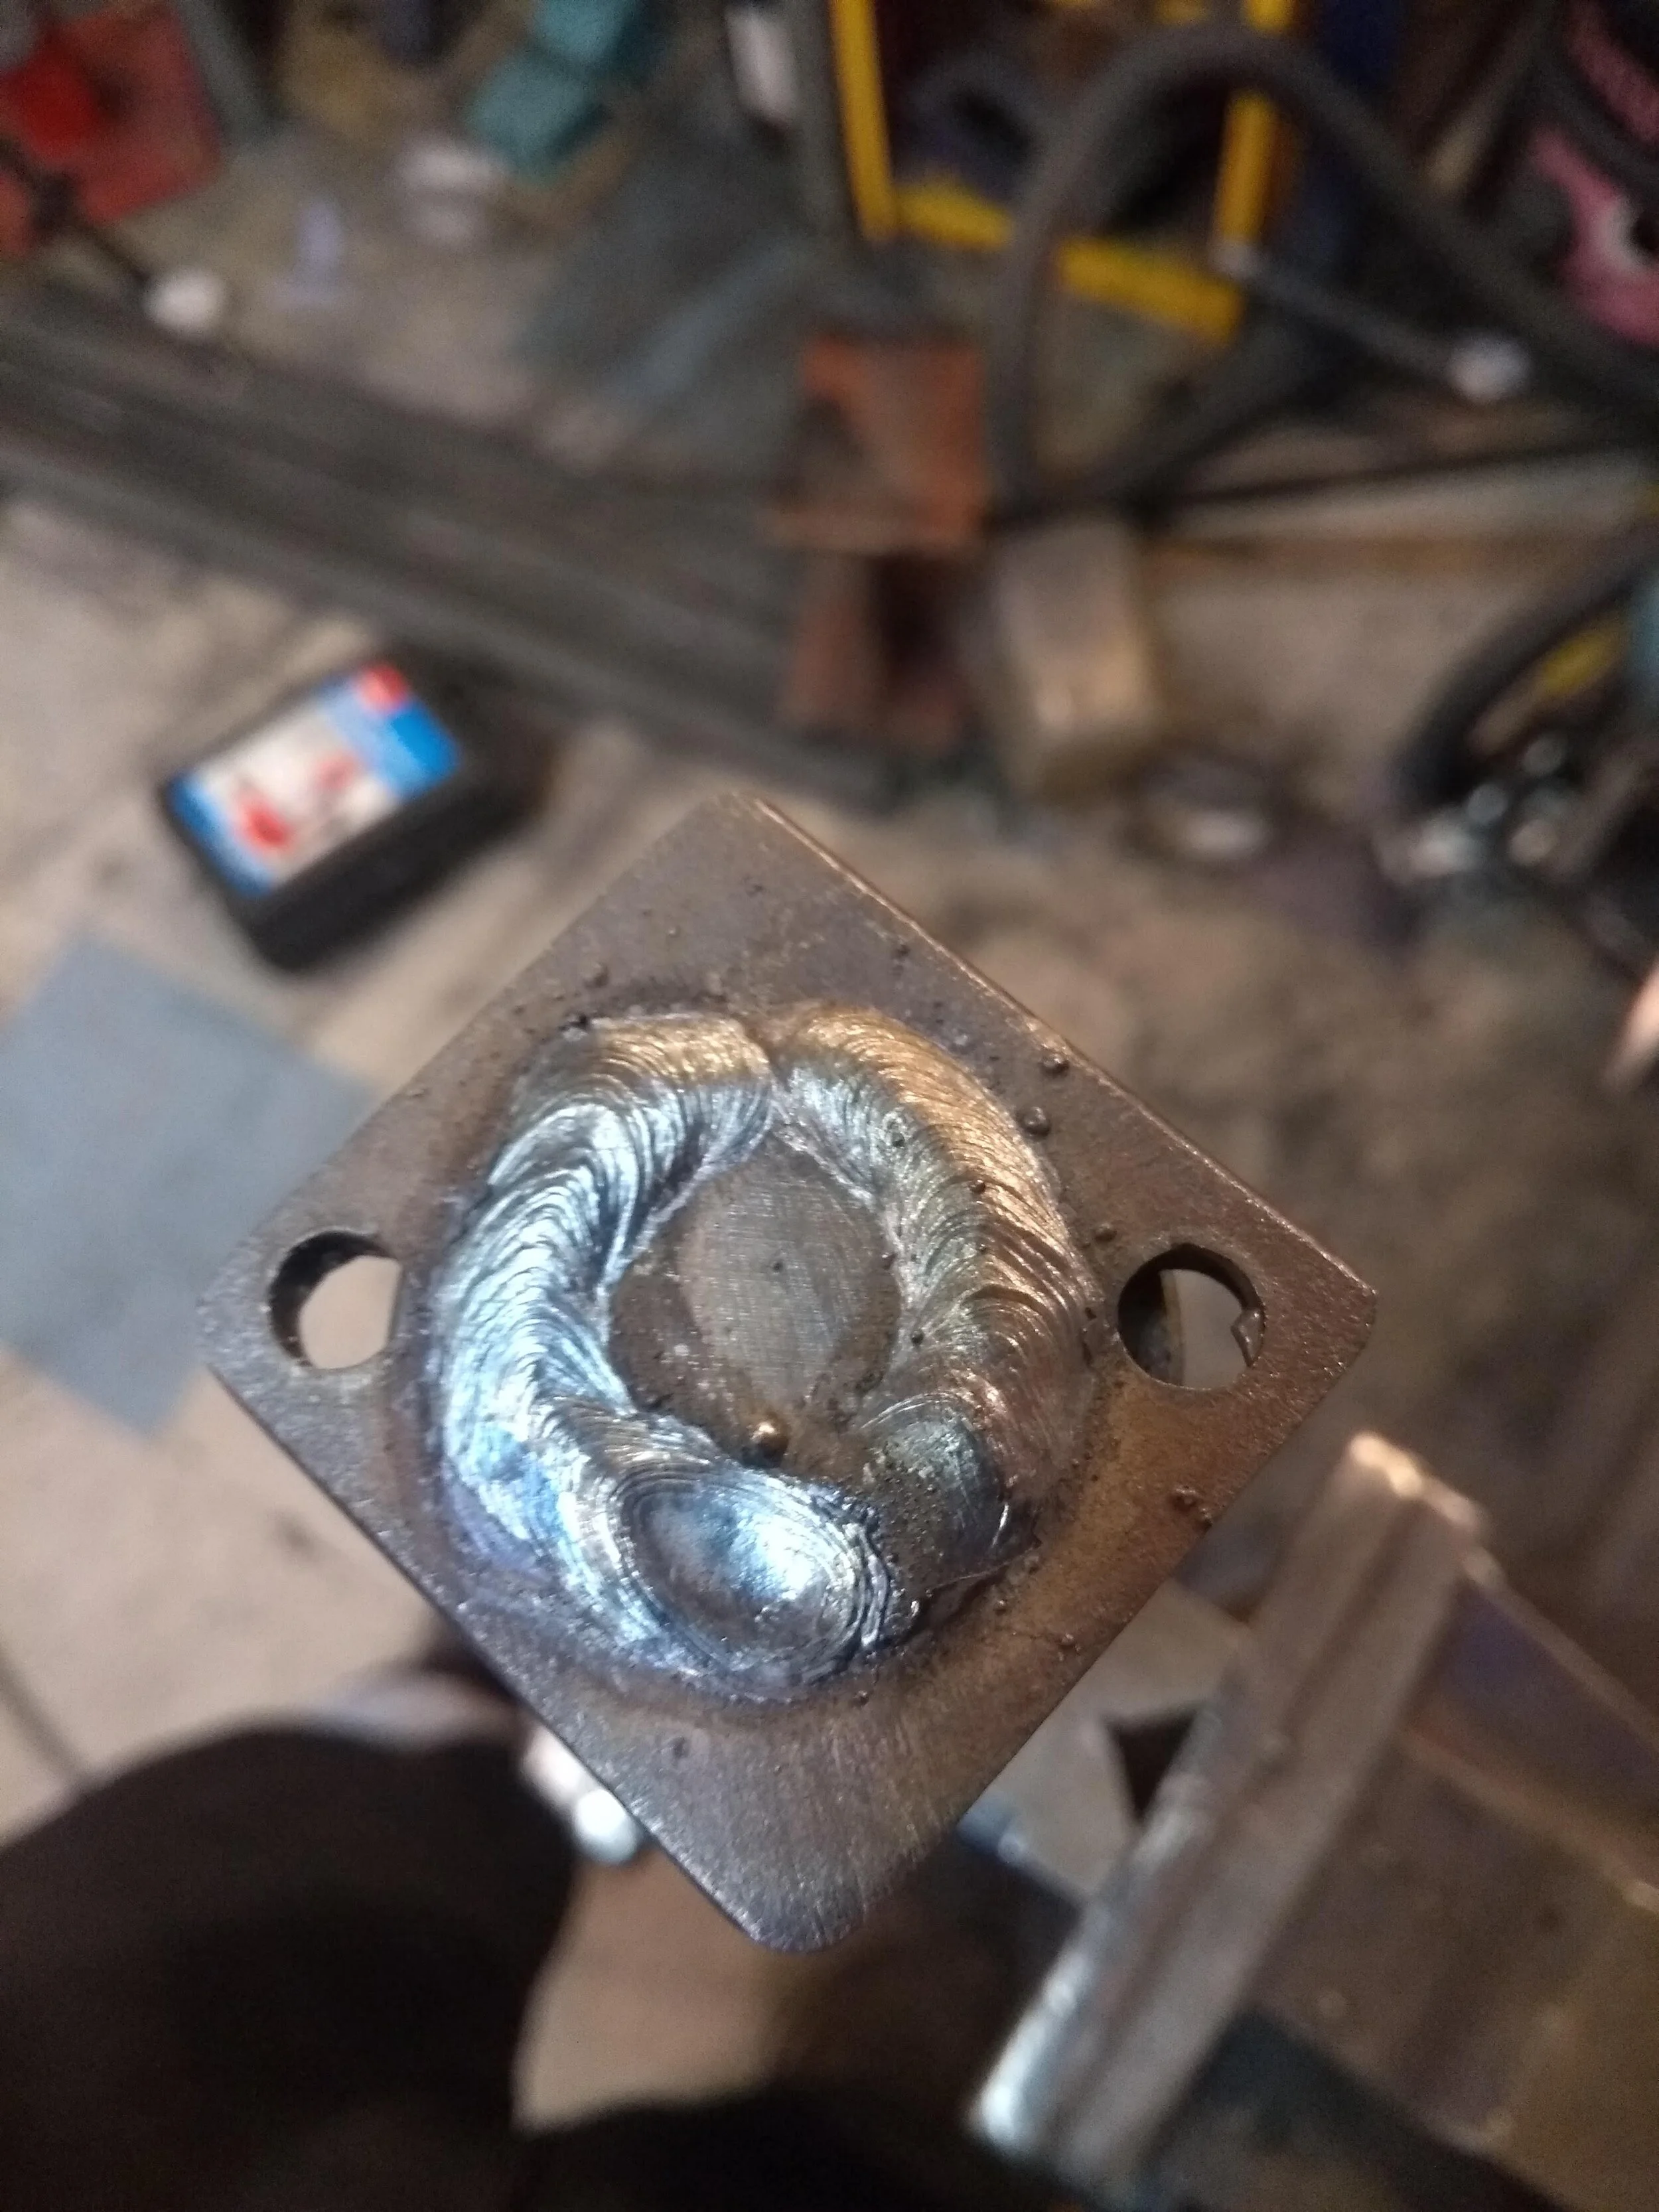
looks a bit like a laurel wreath
The next step was an interesting one. I needed a keyway in the shaft. A keyway is a slot cut axially along the centre of the shaft, and a corresponding slot is cut in whatever you want the shaft to drive. A “key”, which is just a piece of square section stock of some kind, fills the slot, and ensures that the shaft drives the thing you mount on it, in this case the central die of the machine.
I’d never cut a keyway before, because that’s something you need a milling machine for, and when I briefly owned a milling machine it wasn’t really up to the job. However, lathes can be used for milling, by mounting a vertical slide on the carriage and putting the cutter in the spindle. My lathe has a full set of collets, which is ideal for holding cutters. I didn’t have a milling slide, though, so I had to improvise.
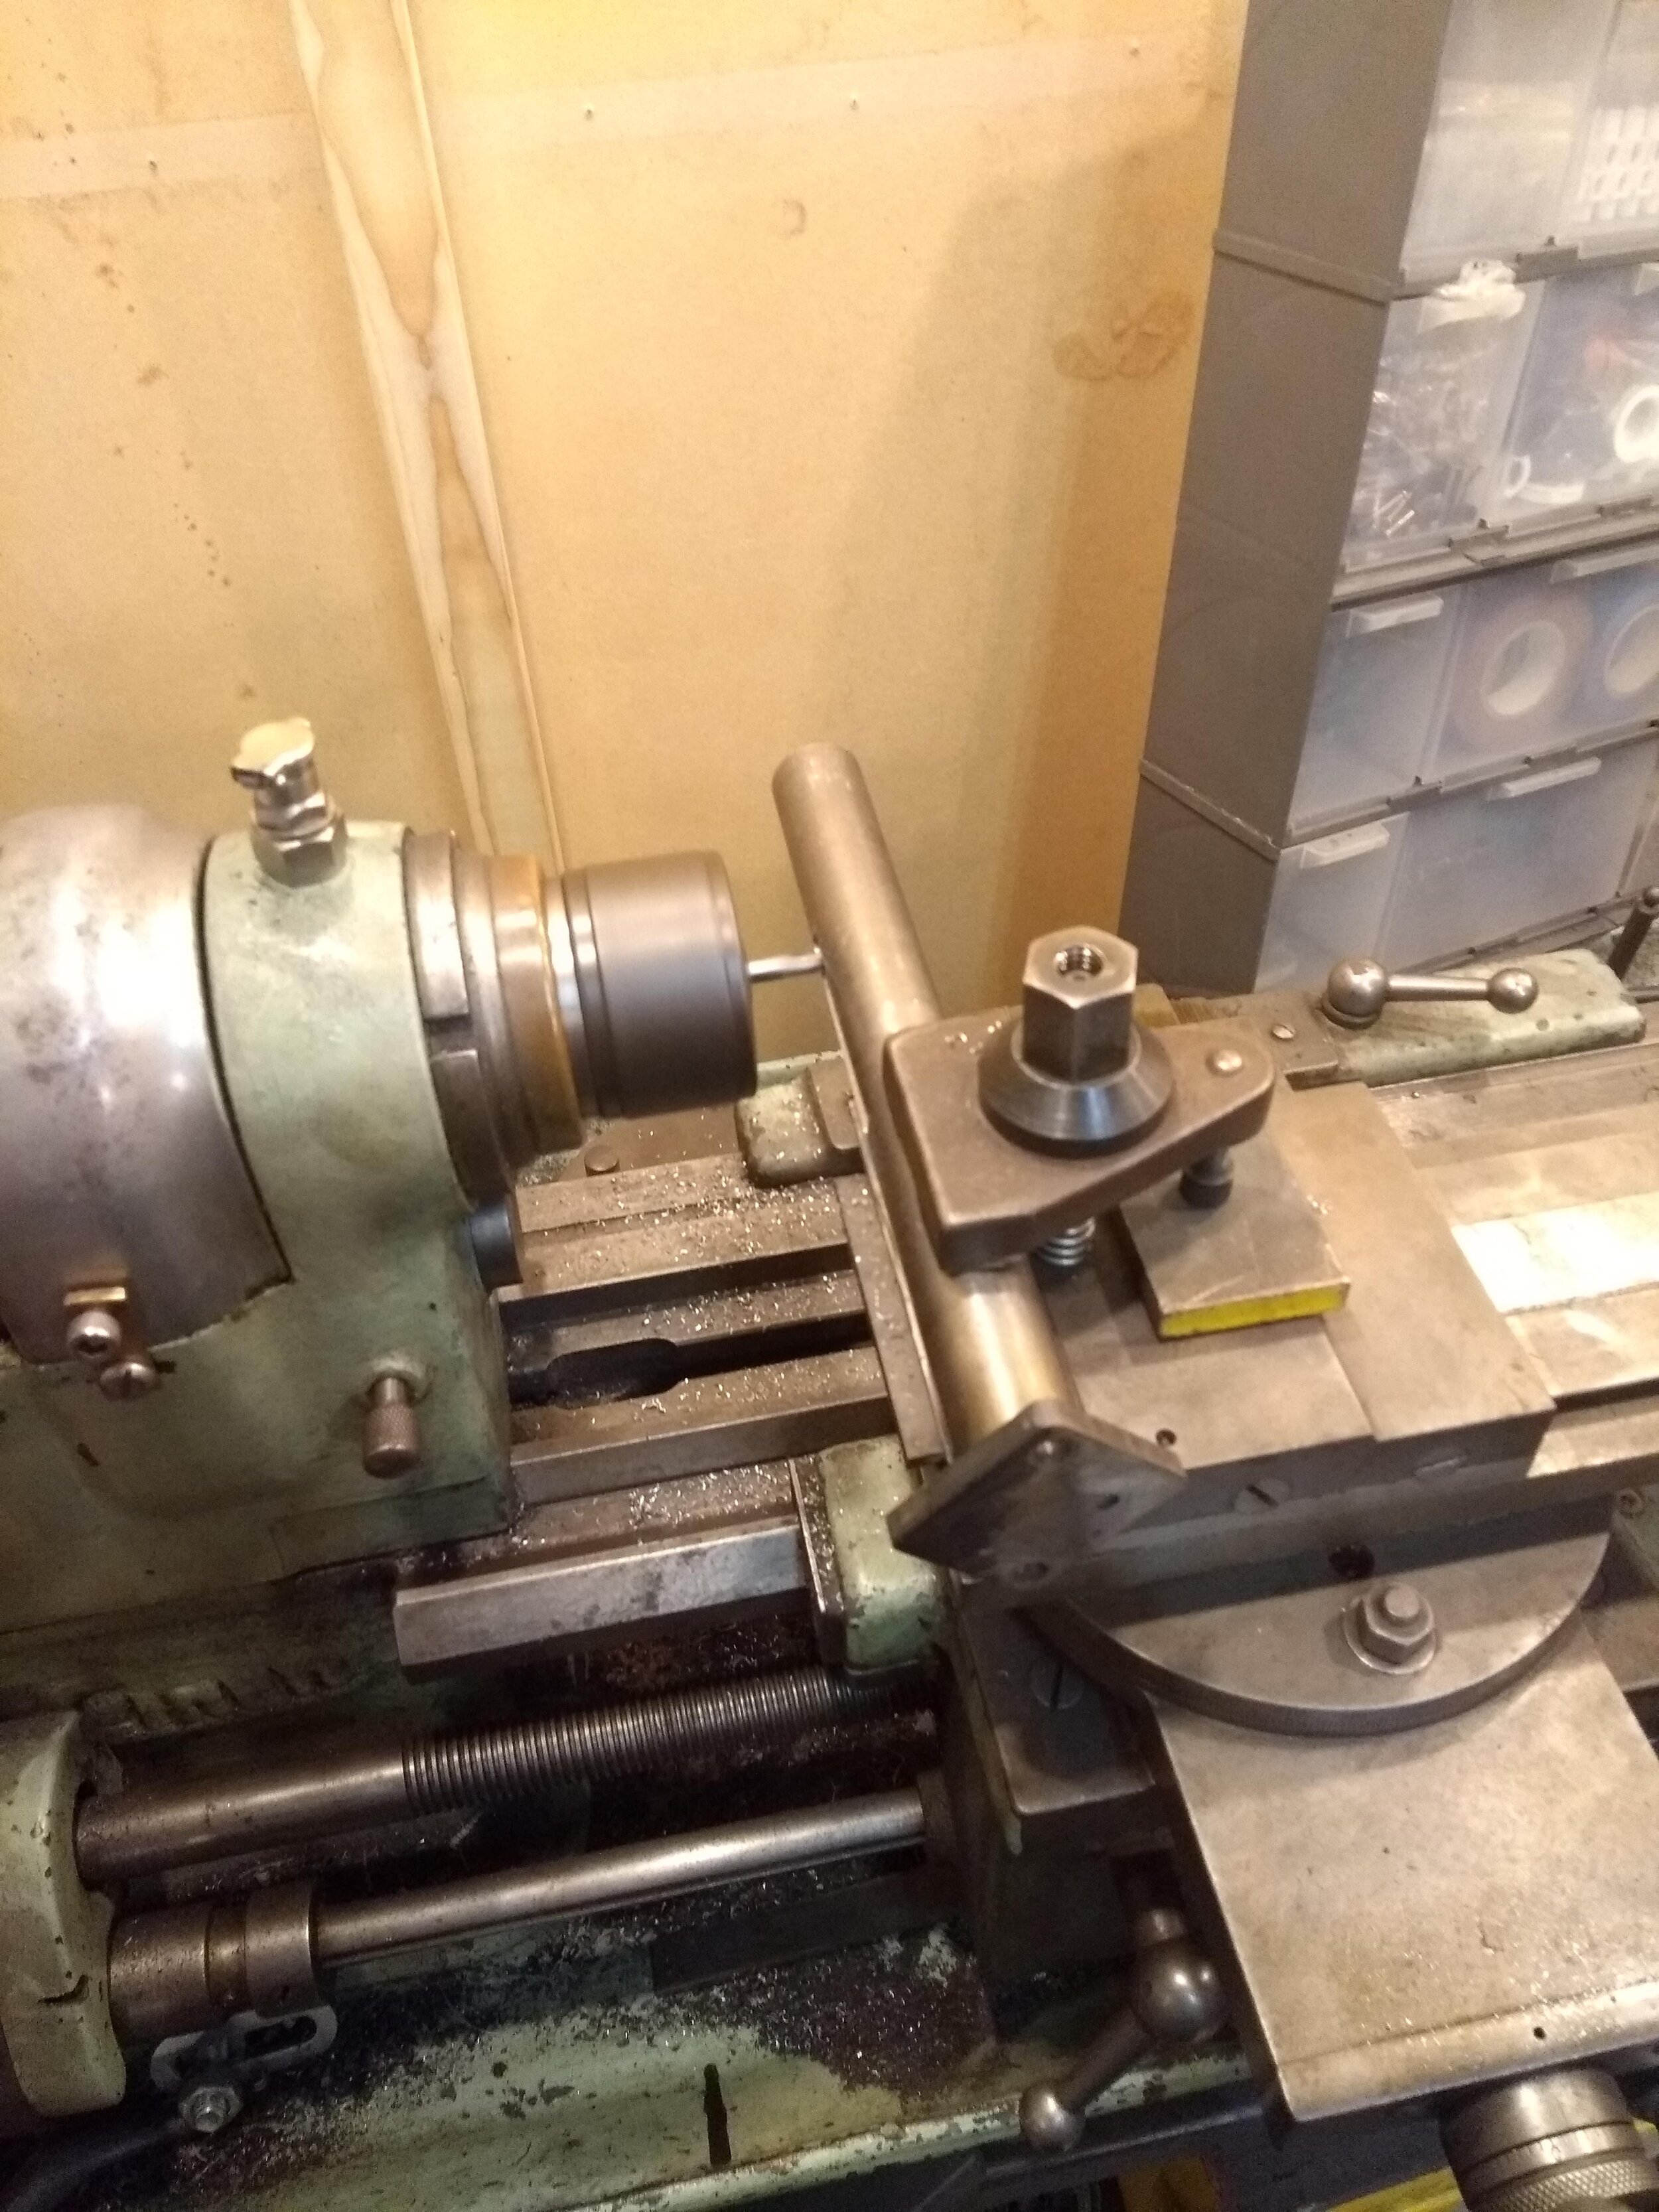
shaft clamped in the toolpost; I was surprised this worked as well as it did
I was honestly amazed at how well this worked! Cutting like that where the work has nothing behind it to support it is not a very good idea, but this lathe is amazingly rigid, and the little V-block thing I knocked together worked remarkably well.

i did it keyway
I then had to file the corresponding keyway into the die using a hand file like some sort of cave person. Once I have this machine running properly and the lathe properly set up for milling, I’ll set up a way of broaching them, which will be much quicker. I’m pleased with the result, though.

keyed shaft, keyed die, key
All that was left to do was assembly! I had a bit of a problem at this point- never having used a keyed shaft before, I hadn’t considered the issue of getting the key into the keyway on the shaft, and then getting the die onto the shaft, all while it was constrained by the bearings. In the end I cut down the key to a length that I was able to squeeze in. I’ve since realised that it is possible with a full length key, but I’ll need to extend the keyway to the end of the shaft.


final assembly
I found a few pieces of 25mm square tube (thin wall, so not especially taxing) in the skip, that already had a slight bend to them, so I dug them out for testing. Getting the balance right between too little pressure and too much is tricky, because in either case the drive die slips, so it’ll take a little practice.
This machine should be able to bend tube of up to 50x50mm with a 3mm wall, which is hefty stuff. When I have it all properly finished, I’ll upload a video of it in action.
I still need to do a few things, like making a way for it to bolt to the table, and building a proper handle to hold on to. Overall though, I’m extremely pleased with the result.
