steel

HarlequinWorks November Update

I’ve started sending out a monthly Mailing List Mail. If you’d like to join the mailing list, you can do so here. Doing so gets you access to all the updates, plus any special offers or discount codes as soon as they go live, rather than waiting for me to get around to posting them here. A week or so after the mailing list mail goes out, I’ll post a blogpost version of it here.

Make sure you read right to the end for a special offer!

Hello!

How are you? Well? In the future these emails will focus on what I’ve been up to in the past month, but since this is the first, I guess it’ll need to encompass All Time up to this point. Make yourself comfortable; this shouldn’t take long.


What’s the deal?

Now, my understanding is that, prior to 1987, various things took place. HOWEVER, I was not there, and so cannot confirm this. My story begins one fateful day in 1987, and then jumps forward 18 years because this is kink stuff we’re talking about.

I’m Harley, and I’ve been on the kink scene for slightly over ten years. Ten years ago I was 23 and lived in Cornwall, and there wasn’t a whole lot going on work-wise, so I became self employed. I’ve made various things in that time. I made whips and other impact toys from paracord, I made clothing, and still do from time to time. But about 6 years ago I moved to London, and that’s when I got back into what, when I was at school, were called Resistant Materials. That’s metal, wood, and plastics. Being kinky, I started making kink stuff.

These days I’m based at my workshop in Croydon. I have a fabrication workshop and a woodshop, in addition to a smaller sewing/office area. I make heavy restraints and bondage gear, dungeon furniture, and various other things, including a popular range of queer Identity Tags and other accessories. 

I also do some building work- the kind where someone wants a trapdoor building into their living room floor and a cage built underneath, and wants someone who understands to build it for them, and thus save them having to try and explain it to a builder.


New Products!

I’ve been very busy in the workshop lately, making a bunch of new heavy steel restraints.
 

Adjustable Industrial Manacles

One.jpg

(Modeled by the wonderful Faerie Willow)
There are two major problems with steel manacles, as I see it. Firstly, they’re expensive, and secondly, they’re not adjustable. I set out to try and do something about that; by using commercially available U-bolts I was able to keep the price down, and the threaded components of the U bolts give great adjustability, to the extent that I believe two sizes will cover more or less every size of wrist and ankle! Check them out in the shop.

Collar Tags

category.jpg

My pronouns tags have been tremendously popular for me over on Etsy. This month, I’ve brought them to my website, and also added a range of steel Collar Tags. Any text (that will fit) can be put on a tag, which can then be attached to a collar with a custom stainless steel jump ring. I’ve already had several personalised custom orders, and orders for double sided tags. This is all included in the price- just £10 for a tag, with free UK shipping from the website! These could be the perfect stocking filler for your sub, or yourself- order yours here!


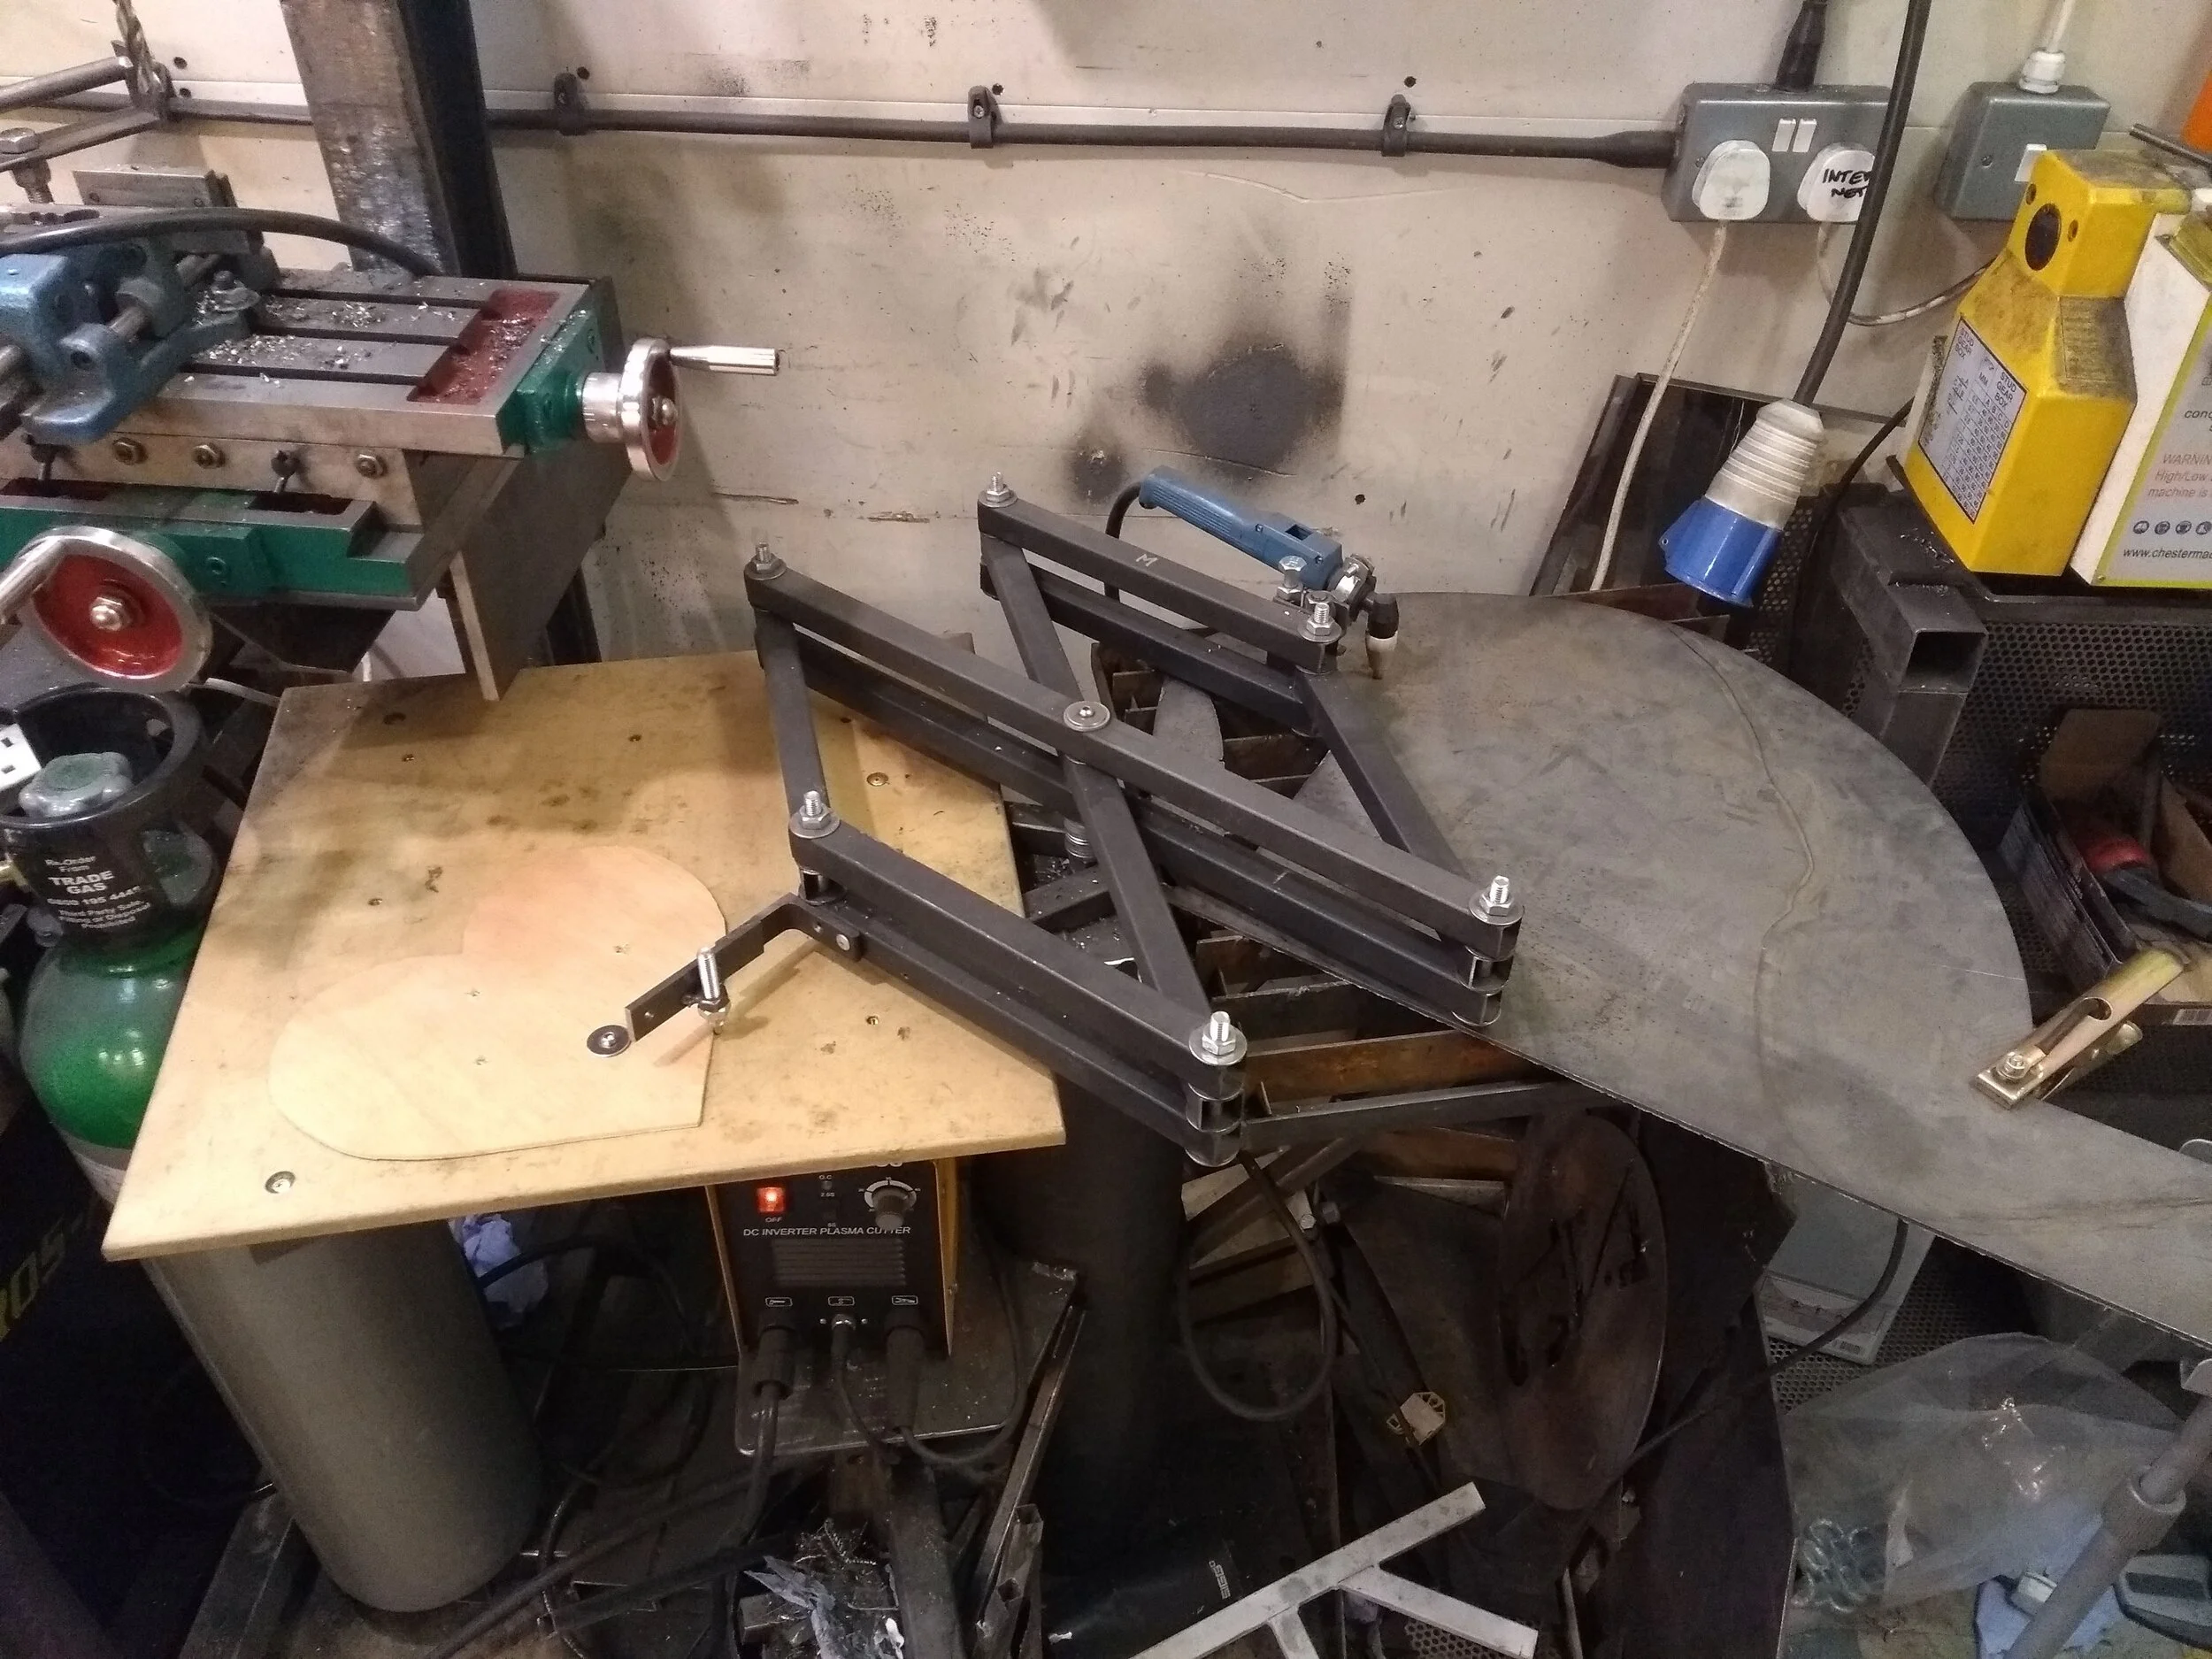
Foldable Steel Stockade

IMG_20201112_125429904.jpg

In addition to the cost and lack of adjustability I mentioned before, another problem with steel restraints, particularly things like spreader bars, is that they can be large and awkward to store or transport. That inspired me to make the Steel Stockade- once again, U-bolts keep the price down, and 40x5mm steel bar folds in half on a robust hinge, and is then held rigid when the central collar U bolt is secured. Buy yours here!
 

Christmas is coming!

I KNOW I haven’t really been on top of it either- it’s been a weird year, to say the least. It’s true, though, it’s now less than a month to Christmas. If you use code “HWCHRISTMAS” at checkout, you’ll get 10% off any order.

Also, I'm very happy to announce that, in the absence of an in person Queer Fayre this year, there's an online one instead, in conjunction with WitchyWomxn. Head over to their website to see what that's about.

 That brings us to the end of the first monthly HarlequinWorks Monthly Upate! Remember, sign up to the mailing list to get next month’s news and offers early!

Thanks very much for reading; see you next month/year!

A Spinner for Faerie Willow

Making stuff is fun, but making stuff for toppy people that you have a crush on? Even MORE fun. The lovely Faerie Willow wanted a spinner for playing games on her OnlyFans (and with me 😍), and one mustn’t keep a Princess waiting.

The spinner is to be heart shaped, and made of steel. That means it’ll need to be cut with the plasma cutter, and that means I’ll need a template, so the first stop: woodshop.

I found a vector image of a heart and printed it out, then transferred it onto some scrappy 3mm plywood

I found a vector image of a heart and printed it out, then transferred it onto some scrappy 3mm plywood

I cut out the heart on my bandsaw

I cut out the heart on my bandsaw

That done, it was time to use what is possibly my favourite machine: the plasma cutter pantograph tracing table. This machine, that I built last year, uses a pantograph to transfer the movements of a scribe perfectly to the plasma torch on the other side. This allows wooden patterns to be used without catching fire, and keeps me a little further from the plasma arc. You can see a video of it in action here.

Template on the left, steel sheet on the right.

Template on the left, steel sheet on the right.

There’s always a bit of fettling to do after plasma cutting- knocking off the slag and tidying up the edges and such. Then it turned out that for some reason the mill scale on this particular piece of steel was super hard, so I had to painstakingly grind it all off. Once that was done, I had this:

<3

<3

The heart needs several holes drilling in it: A clearance hole for the central 12mm shaft on which the pointer will rest, two mounting holes for the bearing that holds the shaft, and then three holes to tap for an M6 thread to hold the machine screws that the whole thing will stand on. My new compound table in the drill press, coupled with a centre I made in the lathe, makes it so easy to accurately line up on punch marks. That’s something I always used to struggle with before.

Also I thought the reflection was cool.

Also I thought the reflection was cool.

Then I tapped the three holes for the legs. With a locknut on each, these socket head capscrews make nice feet that won’t scratch surfaces.

I I I

I I I

With the body of the spinner done, it’s time to make the part that actually spins. I used a piece of brass flatbar for this. I cut it to length filed it, put a nice point on the end with the disc sander, and then drilled and tapped a hole in the centre of it, where it would mount to the shaft.

The pointer cut and polished, before being drilled and tapped.

The pointer cut and polished, before being drilled and tapped.

Next, in order to make the shaft, it was over to the lathe, which is another of my favourite machines. It’s an absolute beast, made in Germany in 1938, and I think I’m only its third owner.

I faced the end of the shaft, and turned it down to 6mm so I could cut an M6 thread on it with a die.

Leinen D23LZ, for those interested

Leinen D23LZ, for those interested

A 12mm shaft with an M6 thread, ready to randomise!

A 12mm shaft with an M6 thread, ready to randomise!

With that done, it was time for final assembly! A flange bearing was bolted in place using the holes drilled earlier, and the pointer was screwed onto the shaft, which was then fastened in the bearing. A quick clean and some clear lacquer, and it’s ready to decide some fates! A big thank you to Willow for allowing me to make this for her.

FinalGif.gif

Metalwork

About 18 months ago I was given an arc welder, an angle grinder, and a host of other old tools by my cousin, who was moving house. I was scared of the welder for a bit, but on my birthday last year, trying hard to avoid working, I took it outside, and plugged it in. It sort of exploded, and knocked out the power, but I took it apart, and rewired it, and then it worked fine.

I started teaching myself how to weld, and for a long time I thought I just wasn't very good at it. Then I bought some decent electrodes and started storing them properly, and my welding improved a great deal. On a fabrication job, my welder kept overheating, and I realised that I'd need a new one. At Harlequin Works, "new" invariably means "new to me but much older than I am", at least when it comes to tools. I bought a Pickhill Bantam, an old oil cooled welder, and that knocked out the power the first time I used it too.  This time I needed to build an inrush inhibitor, to prevent it drawing too much current when it was turned on, and now it, too, works fine, and much better than the old one.

Today, I took delivery of a lathe- it's a step that many metalworkers seem to take, from fabricator, to machinist. The lathe increases the capacity of my shop a great deal. Jobs that were fiddly or impossible before will be easy now, and if I need a part for something, I can almost certainly make it rather than buying it.

People who use tools laugh when I say this, but that's the last big tool, really. Perhaps one day I'll get a milling machine too, but from here, the shop is more or less complete, and any new tools will be upgrades.